Showing posts with label red velvet. Show all posts

Friday, 10 June 2016

Fat Friday #49 Natural Red Velvet Cupcakes


I've always loved the look of red velvet cakes and cupcakes. I've made them before but was always a little off put by the amount of red food colouring. I stumbled across this recipe in one of my favourite books and wanted to try it for a group of friends who were coming over for afternoon tea. Its made with beetroot and raspberries (there is a little food colouring to add a rich colour but you can omit this if you like) so its as natural as it can get. 

Recipe Adapted from Primrose Celebrations by Lisa Thomas and Martha Swift
Beetroot Puree :
  • 1 raw beatroot
  • 35g frozen raspberries
  • 1/2 tablespoon apple cider vinegar 
  • 1/2 tablespoon cold water

Equipment:
  • Blender
  • Chopping board
  • Knife
  • Peeler
  • Bowl
Method:
1) Peel and chop the beetroot into cubes. Place in the blender with the other ingredients.
2)Whizz for 5 minutes, scraping the sides from time to time to make sure that the puree is really smooth.
3)Once smooth place in a bowl to one side. 

Buttercream Ingredients:
  • 80g unsalted butter
  • 160g cream cheese
  • 2 tsp lemon juice
  • 560g icing sugar

Equipment:
  • Handwhisk
  • Bowl

Method:
1)Place all the ingredients into a bowl and mix with a hand whisk until light and fluffy.

Cupcakes Ingredients:
  • 185g self-raising flour
  • a pinch of salt
  • 30g dark chocolate
  • 60g unsalted butter
  • 150g golden caster sugar
  • 2 large eggs
  • 1 teaspoon vanilla extract
  • 55ml milk mixed with 1 teaspoon lemon juice
  • 1 teaspoon natural red food colouring
  • 115g of the beetroot puree

Equipment:

  • Cupcake tray lined with cupcake liners
  • Wire rack 
  • Bowl x 2
  • Hand held electric whisk
  • Saucepan filled with hot water with a heatproof bowl on top/Microwave
  • Sieve


Method:
1)Pre heat oven to GM 4/350f/180c.
2)Sift the flour and salt together in a bowl. Set aside. 
3) Melt the chocolate either in the microwave or on the heatproof bowl with hot water in a saucepan. Make sure the chocolate doesn't burn.
4)Place the butter, sugar, eggs and vanilla in another bowl and mix until light and fluffy. 
5)Add the melted chocolate to the egg and sugar mixture, and whisk again.
6)Pour in the milk and lemon liquid and food colour and mix on a low speed. Then add the beetroot puree and mix again!
7)Add the dry ingredients to the batter, mix and divide into the cupcake cases, filling them about 2/3 full.
8)Bake in the oven for 15-18 minutes. Leave to cool on a wire rack.

Once cool you can decorate as you like! I like to use a palette knife or a piping bag fitted with a circle nozzle. Of course sprinkled with some cute little sprinkle thingies too. 
Happy Friday! 
Bake On! Penny x

Tuesday, 14 April 2015

Happy Birthday (to me!) Cakes!

Yay today is my birthday! Woo!! Happy Birthday to me! I'll be doing a follow up post on what I did for my birthday later in the month. But for the today here's my ultimate list of drool-worthy birthday that I would love to receive (hint).


Bake On! Penny x

Wednesday, 23 April 2014

Red Velvet Cake with Blue Lace Butterfies

"Remember, Sofia has no idea about this birthday meal. Keep it quiet! So I'm thinking red velvet cake?" I read the message that my friend sent and was like: "Yessss!! Cake commission!!"
This particular cake was for a good friend who I've made birthday cakes for in the past.   

Red velvet is one of those cakes that has that luxury feel, and it wouldn't be the same without a white icing but trying to incorporate blue, (which is Sofia's favourite colour) was tough. But after a great deal of thinking, inspiration came in from an insect form. 

I was waiting for the bus when a butterfly flew past me and as I got home I was reading my cookery books for inspiration and a royal icing tutorial jumped out at me and guess what? It featured butterflies. Clearly a sign right? Or maybe just an odd coincidence? Whatever the case, the end result was worth the extra effort. 

I was very please how this cake turned out. Not because it was tasty and super sugary (because that's what you need after a heavy meal...), but more because my best friends was thrilled with the cake. 

I hope that we made your birthday really special Sofia.


These delicate butterflies are just that, DELICATE! Make extra because there will be causalities but there worth the effort in the end as they look so pretty. You have to leave these to dry overnight, so do these before you bake the cake. 

Recipe: Lace Butterflies (Adapted from Divine Cupcakes by Tamara Jane)

Ingredients:
·       1 egg white
·       Ice blue colouring paste
·       300g icing sugar
·       ½ teaspoon lemon juice

Equipment:
·       Electric mixer/hand-held electric whisk
·       Sieve
·       Bowl x 1
·       Baking paper
·       Foil
·       Paper
·       Pencil/pen
·       Edible glitter in pink
·       Disposable piping bag
·       Scissors

Step 1. Beat the egg white
1.    Beat the egg white with an electric mixer until foamy.
2.    Add the icing sugar gradually beating well after each addition.
Step 3. Colour the icing
3.    Icing is ready when peaks appear and holds shape. Beat in lemon juice and food colouring. 
Step 4. Trace a butterfly template
4.    Trace a butterfly template (use a simple one as a complex template will be tricky) onto paper and place the baking paper on top.
Step 5. Fill the piping bag
5.    Fill the bag with royal icing and cut the point off the bag so there is a 1mm diameter.
Step 6. Pipe the thin line to create the butterfly
6.    Pipe a thin line over the template. Once finish sprinkle with edible glitter and allow to dry overnight.
Step 7. Place on decorated cake 
7.    Peel off the paper and use to decorate the cake by placing around the sides of the cake.
8.    With the remaining icing pipe your message on top of the cake.

Recipe: Red Velvet Cake
·       75g unsalted butter, softened (plus a little extra for greasing)
·       300g caster sugar
·       2 eggs, beaten
·       1 teaspoon vanilla extract
·       225g plain flour
·       3 tablespoons unsweetened cocoa powder
·       1 ½ teaspoon red food colour paste
·       125ml buttermilk
·       1 tablespoon white vinegar

Equipment:
·       Wilton Tasty Fill cake pan
·       Electric mixer/hand-held electric whisk
·       Sieve
·       Bowl x 2
·       Tablespoon
·       Teaspoon

1.    Pre heat the oven to 180c/350c/ Gas mark 4. Grease and flour cake tins.
Step 2. Sift all dry ingredients together

2.    For the cake, cream the butter and sugar together in a bowl, then beat in the eggs and vanilla extract. Sift the flour, cocoa powder, bicarbonate of soda and salt into a separate bowl. Stir in the food colour paste into buttermilk.
3.    Alternately add the flour and buttermilk mixtures to the creamed mixture. Stir in the vinegar, mixing well. Pour the mixture into the prepared tins, dividing it evenly. Bake in the oven for 30-35 mins or until firm to touch. Cool in the tins for 10 mins, then turn out onto a wire rack and leave to cool completely.

Recipe: Bulk Vanilla Buttercream frosting (Adapted from Divine Cupcakes by Tamara Jane)
·       200g unsalted butter, softened
·       125ml milk
·       1 tablespoon vanilla extract
·       2kg icing sugar, sifted
Equipment:
·       Electric mixer/hand-held electric whisk
·       Sieve
·       Bowl x 1
        Palette knife
       Optional piping bag fitted with a nozzle
1.Using a large mixer, cream the butter for 1-2 minutes.
2. Add the milk, vanilla and half the icing sugar and beat for 3 minutes or until light a fluffy.
Step 3. Beat until spreadable
3. Add the remaining icing sugar and beat for a further 3 minutes or until it is a spreadable consistency.
Step 4. Spread  the buttercream into the middle of the cake.
4. Once the cakes are completely cooled you can start putting some of the buttercream into the middle of the cake. 
5. Spread the rest of the buttercream over the top and sides of the cake using a palette knife ensuring it is as smooth as you can get it. 
6. If you have any leftover buttercream (depends on how thick you like it on your cake), you can place some in a piping bag fitted with a star nozzle to swirl around the edges. 

Its not as hard as it looks and is worth the effort and the smile on peoples faces when they see a 3-D cake.


Bake On! Penny x

Sunday, 16 September 2012

The Hidden Heart Cake

Right first real post to do with baking! Woo!
I do my fair share of reading baking and cooking blogs, but I saw this oh so cool Hidden Heart tutorial from i am baker.

It was a case of what occasion I need to make such a cool cake? Then I get invited to a friends birthday dinner. Perfect!
I made her a birthday cake that I know that she would love!
It was the first ever time that I made this cake and I've NEVER made a layer cake like this. So, first time effort plus never made a cake like this, I'd like to think deserve a little pat on the back.
Here is the batter photo's. I used a victoria sandwich sponge recipe which turned out really light and delicious. (This is at the bottom of the post.)
I made 4 cakes (the recipe below makes 2 cakes if you split them into 2 tins. I used 7 inch tins.)
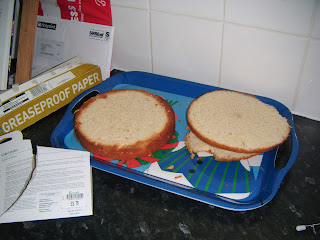
After all the cakes were cooled I popped them in the freezer to firm up and make it easier to level. Below, are the pictures of leveled cakes. Of course I had a cake lever to give me a hand.

Next you need I put a thick layer of buttercream between two of the sponges. This is one of the most important lessons ever: double check you've got the right ingredients. I say this because I ran out of ingredients to make my own buttercream, so I had to use buttercream from a can, homemade tastes nicer. So what's that rule again? double check you've got all the right ingredients.
Once the cakes were firmly 'glued' together with the buttercream, by being in the freezer for a couple of hours, I tied erm... dental floss to two toothpicks to create a guideline around both cakes. (I couldn't find string, dental floss did the trick.)
Next was the super hardest bit, the carving out. One cake needed to have a 'V' in the middle and the other needed to have a volcano and canal (see below. However, I can see that now it was too domed shaped rather then volcano shaped.) I find the best thing to do is carve with a knife and then  spoon out any extra bits.
Next I crumbed up the red velvet cake, and then filled it into the carved gaps with the white cake.
Next both cakes went into the freezer overnight with a thin layer of buttercream also called a crumb coat. Then the fun part, the decorating. Essentially I covered the whole cake in vanilla buttercream and used some basic piping skills to do the edges. Then dyed the sugarpaste red and stamped out letters and butterflies. Then I added some the leftover red velvet crumbs around edges.
You know, it looks like a pretty birthday cake.


The point is, that the birthday girl loved the cake.

Personally, I thought it looked more like a smile then a heart. But not bad for a first try. But the top layer, the 'volcano and canal' carved cake needs to reassemble a volcano rather then a dome shape. Remember to try this for yourself check out i am baker's tutorial.

Recipe time:
Victoria sandwich from "Saved by Cake" by Marian Keyes 

  •        200g unsalted butter
  •        200g caster sugar
  •        4 eggs
  •        1 tea spoon vanilla extract
  •        200g self raising flour

1.    Butter two 7cm tins and line the bases with baking paper. Pre-heat the oven to 190c/375f/Gas Mark 5.
2.    Cream the butter and sugar together until pale and fluffy. Add the eggs, one by one, beating between each addition. The mix may curdle a little but add a tablespoon of flour if this happens.
3.    Stir in the vanilla extract and sieve in the flour and fold through.
4.    Divide the mix between tins and bake for about 20 minutes.

 Red velvet cake from "Cakes Galore" by Valerie Barrett

  •        75g unsalted butter, soften
  •        300g caster sugar
  •        2 eggs, beaten
  •        1 teaspoon vanilla extract
  •        225g plain flour
  •        3 tablespoons unsweetened cocoa powder
  •        1 ½ teaspoon red food colour paste
  •        125ml buttermilk
  •       1 tablespoon white vinegar
  •        a pinch of salt 


  1.     Preheat the oven to 180c/350c/ gas mark 4. Grease and flour two 23cm round sandwich cake tins.
  2.     For the cake, cream the butter and sugar together in a bowl, then beat in the eggs and vanilla extract. 
  3.     Sift the flour, cocoa powder, bicarbonate of soda and salt into a separate bowl. Stir in the food colour paste into buttermilk.
  4.     Alternately add the flour and buttermilk mixtures to the creamed mixture. Stir in the vinegar, mixing well. 
  5.     Pour the mixture into the prepared tins, dividing it evenly. Bake in the oven for 30-35 mins or until firm to touch. 
  6.     Cool in the tins for 10 mins, then turn out onto a wire rack and leave to cool completely.

I hope you give this try!
Bake on!
Penny


Bake On! Penny x
Related Posts Plugin for WordPress, Blogger...