I do my fair share of reading baking and cooking blogs, but I saw this oh so cool Hidden Heart tutorial from i am baker.
It was a case of what occasion I need to make such a cool cake? Then I get invited to a friends birthday dinner. Perfect!
I made her a birthday cake that I know that she would love!
It was the first ever time that I made this cake and I've NEVER made a layer cake like this. So, first time effort plus never made a cake like this, I'd like to think deserve a little pat on the back.
Here is the batter photo's. I used a victoria sandwich sponge recipe which turned out really light and delicious. (This is at the bottom of the post.)
I made 4 cakes (the recipe below makes 2 cakes if you split them into 2 tins. I used 7 inch tins.)
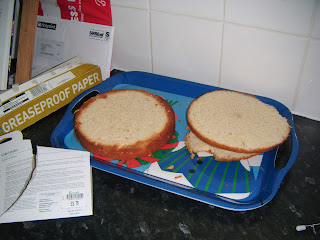
After all the cakes were cooled I popped them in the freezer to firm up and make it easier to level. Below, are the pictures of leveled cakes. Of course I had a cake lever to give me a hand.
Next you need I put a thick layer of buttercream between two of the sponges. This is one of the most important lessons ever: double check you've got the right ingredients. I say this because I ran out of ingredients to make my own buttercream, so I had to use buttercream from a can, homemade tastes nicer. So what's that rule again? double check you've got all the right ingredients.
Once the cakes were firmly 'glued' together with the buttercream, by being in the freezer for a couple of hours, I tied erm... dental floss to two toothpicks to create a guideline around both cakes. (I couldn't find string, dental floss did the trick.)
Next was the super hardest bit, the carving out. One cake needed to have a 'V' in the middle and the other needed to have a volcano and canal (see below. However, I can see that now it was too domed shaped rather then volcano shaped.) I find the best thing to do is carve with a knife and then spoon out any extra bits.
Next I crumbed up the red velvet cake, and then filled it into the carved gaps with the white cake.
Next both cakes went into the freezer overnight with a thin layer of buttercream also called a crumb coat. Then the fun part, the decorating. Essentially I covered the whole cake in vanilla buttercream and used some basic piping skills to do the edges. Then dyed the sugarpaste red and stamped out letters and butterflies. Then I added some the leftover red velvet crumbs around edges.
You know, it looks like a pretty birthday cake.
The point is, that the birthday girl loved the cake.
Personally, I thought it looked more like a smile then a heart. But not bad for a first try. But the top layer, the 'volcano and canal' carved cake needs to reassemble a volcano rather then a dome shape. Remember to try this for yourself check out i am baker's tutorial.
Recipe time:
Victoria sandwich from "Saved by Cake" by Marian Keyes
- 200g unsalted butter
- 200g caster sugar
- 4 eggs
- 1 tea spoon vanilla extract
- 200g self raising flour
1. Butter two 7cm tins and line the bases with baking paper. Pre-heat the oven to 190c/375f/Gas Mark 5.
2. Cream the butter and sugar together until pale and fluffy. Add the eggs, one by one, beating between each addition. The mix may curdle a little but add a tablespoon of flour if this happens.
3. Stir in the vanilla extract and sieve in the flour and fold through.
4. Divide the mix between tins and bake for about 20 minutes.
Red velvet cake from "Cakes Galore" by Valerie Barrett
- 75g unsalted butter, soften
- 300g caster sugar
- 2 eggs, beaten
- 1 teaspoon vanilla extract
- 225g plain flour
- 3 tablespoons unsweetened cocoa powder
- 1 ½ teaspoon red food colour paste
- 125ml buttermilk
- 1 tablespoon white vinegar
- a pinch of salt
- Preheat the oven to 180c/350c/ gas mark 4. Grease and flour two 23cm round sandwich cake tins.
- For the cake, cream the butter and sugar together in a bowl, then beat in the eggs and vanilla extract.
- Sift the flour, cocoa powder, bicarbonate of soda and salt into a separate bowl. Stir in the food colour paste into buttermilk.
- Alternately add the flour and buttermilk mixtures to the creamed mixture. Stir in the vinegar, mixing well.
- Pour the mixture into the prepared tins, dividing it evenly. Bake in the oven for 30-35 mins or until firm to touch.
- Cool in the tins for 10 mins, then turn out onto a wire rack and leave to cool completely.
I hope you give this try!
Bake on!
Penny


No comments
Post a Comment